
Are you struggling with insufficient light control or restless nights due to ineffective blinds? Poorly installed blinds can fail to block out light properly, disrupting your sleep and affecting privacy.
Our step-by-step guide on installing blackout blinds will help you achieve perfect light blocking and enhance your comfort. Follow these clear instructions to ensure a flawless fit and enjoy the benefits of complete darkness and improved privacy.
1. Tools and Materials Needed

Installing blackout blinds effectively requires a few key tools and materials. Here’s what you’ll need to get the job done:
Essential Tools
Equip yourself with the right tools for a flawless blackout blind installation. Discover the essential items needed to achieve a precise and professional finish.
- Tape Measure: Accurate measurements of your window dimensions are crucial for a precise fit.
- Spirit Level: Ensures the brackets are mounted straight and the blinds hang evenly.
- Drill: This is required to make holes in the wall or window frame. Consider using a drill bit suitable for your wall type (e.g., masonry for brick or concrete).
- Screwdriver: Useful for tightening screws if you prefer manual tools.
- Step Ladder: Needed if the window is out of reach to access the installation area safely.
Additional Materials
Ensure a successful blackout blind installation using the right materials. Find out what extra items you’ll need for a seamless and secure fit. Here are some:
- Screws and Wall Plugs: Used to secure the brackets in place. Wall plugs provide extra support when drilling into drywall or hollow walls.
- Blackout Blinds: The main component of the installation, including any brackets and mounting hardware provided.
- Pencil: This marks bracket positions on the wall or window frame
- Hammer: It may be necessary to tap in wall plugs gently.
- Cloth or Dust Sheet: To protect the area around the installation site and catch any debris.
2. Measuring Your Windows
Accurate measurements are crucial for a perfect fit when installing blackout blinds. Start by deciding whether you want an inside mount or an outside mount.
For an inside mount, measure the width of the window opening at three points: the top, middle, and bottom. Use the narrowest measurement to ensure the blinds fit within the window frame. Measure the height at the left, centre, and right sides, using the longest measurement for the correct drop.
For an outside mount, measure the width of the area you want to cover, adding extra inches on each side to ensure complete coverage and block out light effectively. Measure the height from the top of the window frame to the desired length, adding extra length if you want the blinds to extend beyond the window frame for better light control.
Account for obstructions, such as window handles or trim, and ensure your measurements consider these elements. Marking positions with a tape measure and a pencil can help with precision.
3. Preparing for Installation
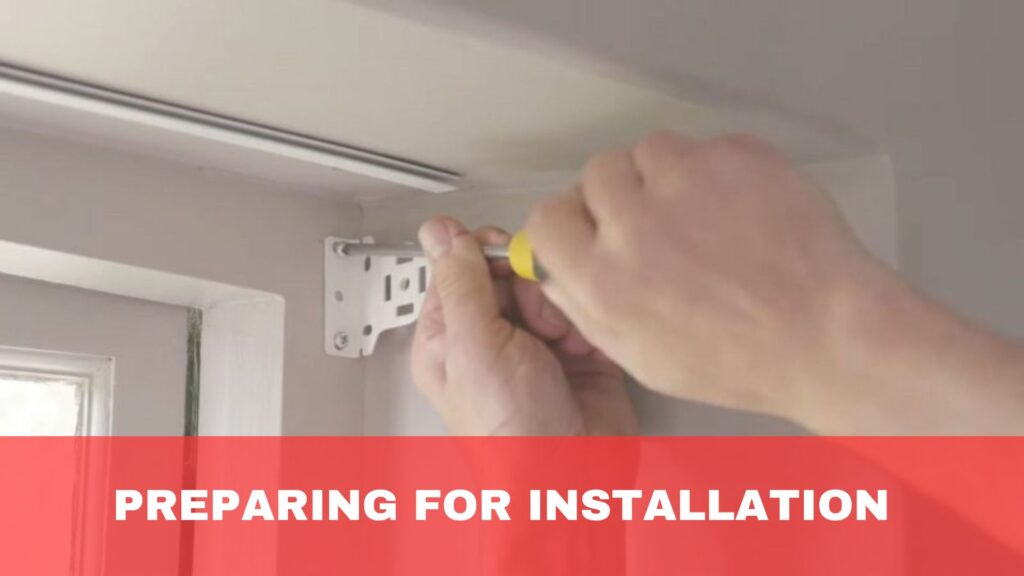
Proper preparation is key to a smooth installation of blackout blinds. Begin by clearing the area around the window to provide ample space for working. Remove any existing window treatments, such as curtains or blinds, and ensure the window frame or wall surface is clean and dry.
Next, gather your tools and materials, including the drill, screws, a tape measure, and the blackout blinds with their mounting hardware. Use a pencil to mark the bracket positions on the wall or window frame, ensuring these marks are level.
If installing on drywall, use a stud finder to locate and mark the positions of wall studs for a more secure installation. Check that you have all necessary components before starting, including brackets, screws, and any additional hardware.
If the blinds come with specific installation instructions, review them carefully to ensure you follow the manufacturer’s guidelines.
4. Installing the Brackets
Start by aligning the brackets with the pencil marks you made during preparation. Using a spirit level, ensure they are level. For an inside mount, position the brackets inside the window frame.
If you opt for an outside mount, place the brackets on the wall above or around the window frame to achieve maximum coverage.
Using a drill, create holes at the marked positions. If drilling into drywall, insert wall plugs to provide extra support. Align the brackets with the drilled holes and secure them with screws.
Make sure the screws are tight, but be careful not to over-tighten, as this could damage the wall or frame.
For multiple brackets, ensure they are evenly spaced and aligned to support the blinds properly. If the brackets have adjustable components, set them to the appropriate position before securing them.
Double-check the stability of the installed brackets by gently tugging them to ensure they are firmly attached.
5. Attaching the Blackout Blinds
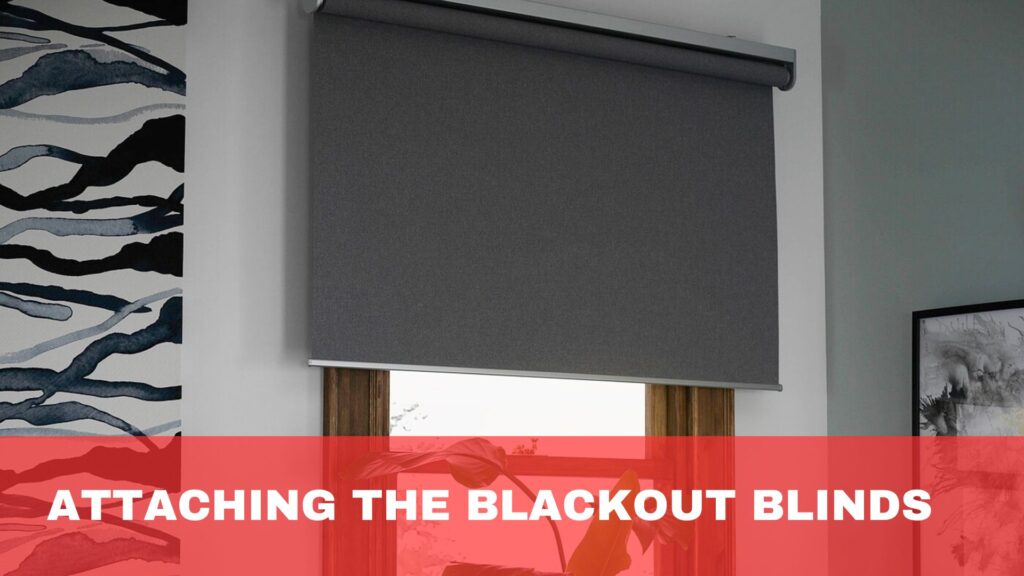
If your blinds use a hook mechanism, hook each side of the blind into the corresponding bracket. Ensure the hooks are securely fastened. For blinds with a slot mechanism, slide the headrail into the bracket slots, ensuring it clicks into place.
Once the blinds are in position, check their level and adjust if necessary. Test their operation by raising and lowering them to ensure smooth movement.
If the blinds have a cord or chain, ensure it is correctly routed through the control mechanism and free of tangles.
If the blinds have adjustable features, such as tilt or length, make final adjustments to achieve the desired fit and functionality. Ensure the blinds are evenly spaced and aligned with the window frame for optimal light blocking and aesthetic appeal.
6. Maintenance Tips

Proper maintenance of your blackout blinds ensures their longevity and optimal performance. Regular upkeep is essential for keeping them looking good and functioning effectively.
- Cleaning the Blinds: For routine cleaning, use a microfibre cloth or a vacuum with a brush attachment to remove dust and debris. For deeper cleaning, gently wipe the blinds with a damp cloth and mild detergent, avoiding harsh chemicals or abrasives. For fabric blinds, follow the manufacturer’s washing or spot-cleaning instructions.
- Inspecting for Wear and Tear: Periodically inspect the blinds for wear, such as frayed cords or bent slats, and address any issues promptly to prevent further damage. Ensure all moving parts, including tilt and lift mechanisms, operate smoothly and replace damaged components as needed.
- Preventing Moisture Damage: Avoid exposing blinds to excessive moisture, particularly in humid environments, to prevent warping, rust, or mould. If they get wet, dry them thoroughly and promptly, and consider using a dehumidifier or moisture barrier in high-humidity areas.
- Adjusting and Lubricating: Adjust the brackets or mechanisms to ensure the blinds operate smoothly. If the blinds are stiff or noisy, a light application of silicone-based lubricant can help improve their movement. Avoid over-lubricating, as this can attract dust and dirt.
- Addressing Stains and Spills: For stains, act quickly by blotting the area with a clean, damp cloth. For persistent stains, refer to the manufacturer’s cleaning recommendations. Avoid scrubbing, which can damage the material.
- Regular Inspections: Schedule regular inspections to ensure the blinds are in good condition and functioning correctly. Regular maintenance can extend the lifespan of your blinds and keep them looking their best.
Conclusion
Following these steps, you can install your blackout blinds professionally, enhancing privacy and light control in your space.
For more expert tips or to explore a wide range of blackout blinds, visit our website and get started on transforming your home today.